He occasionally blogs about software design, continuous integration and game development with Godot Engine.
How to publish your Godot Game to itch.io via Github actions
Manually building and uploading your Godot games can be painful and time-consuming. In this tutorial am going to show you how to automate the process:
- let Github build your game via Github Actions
- Github creates a new release
- publish automatically to itch.io
Prequisites
- Github account
- itch.io account
- published game page on itch.io
- a Godot game project pushed to a Github repository
Initial setup
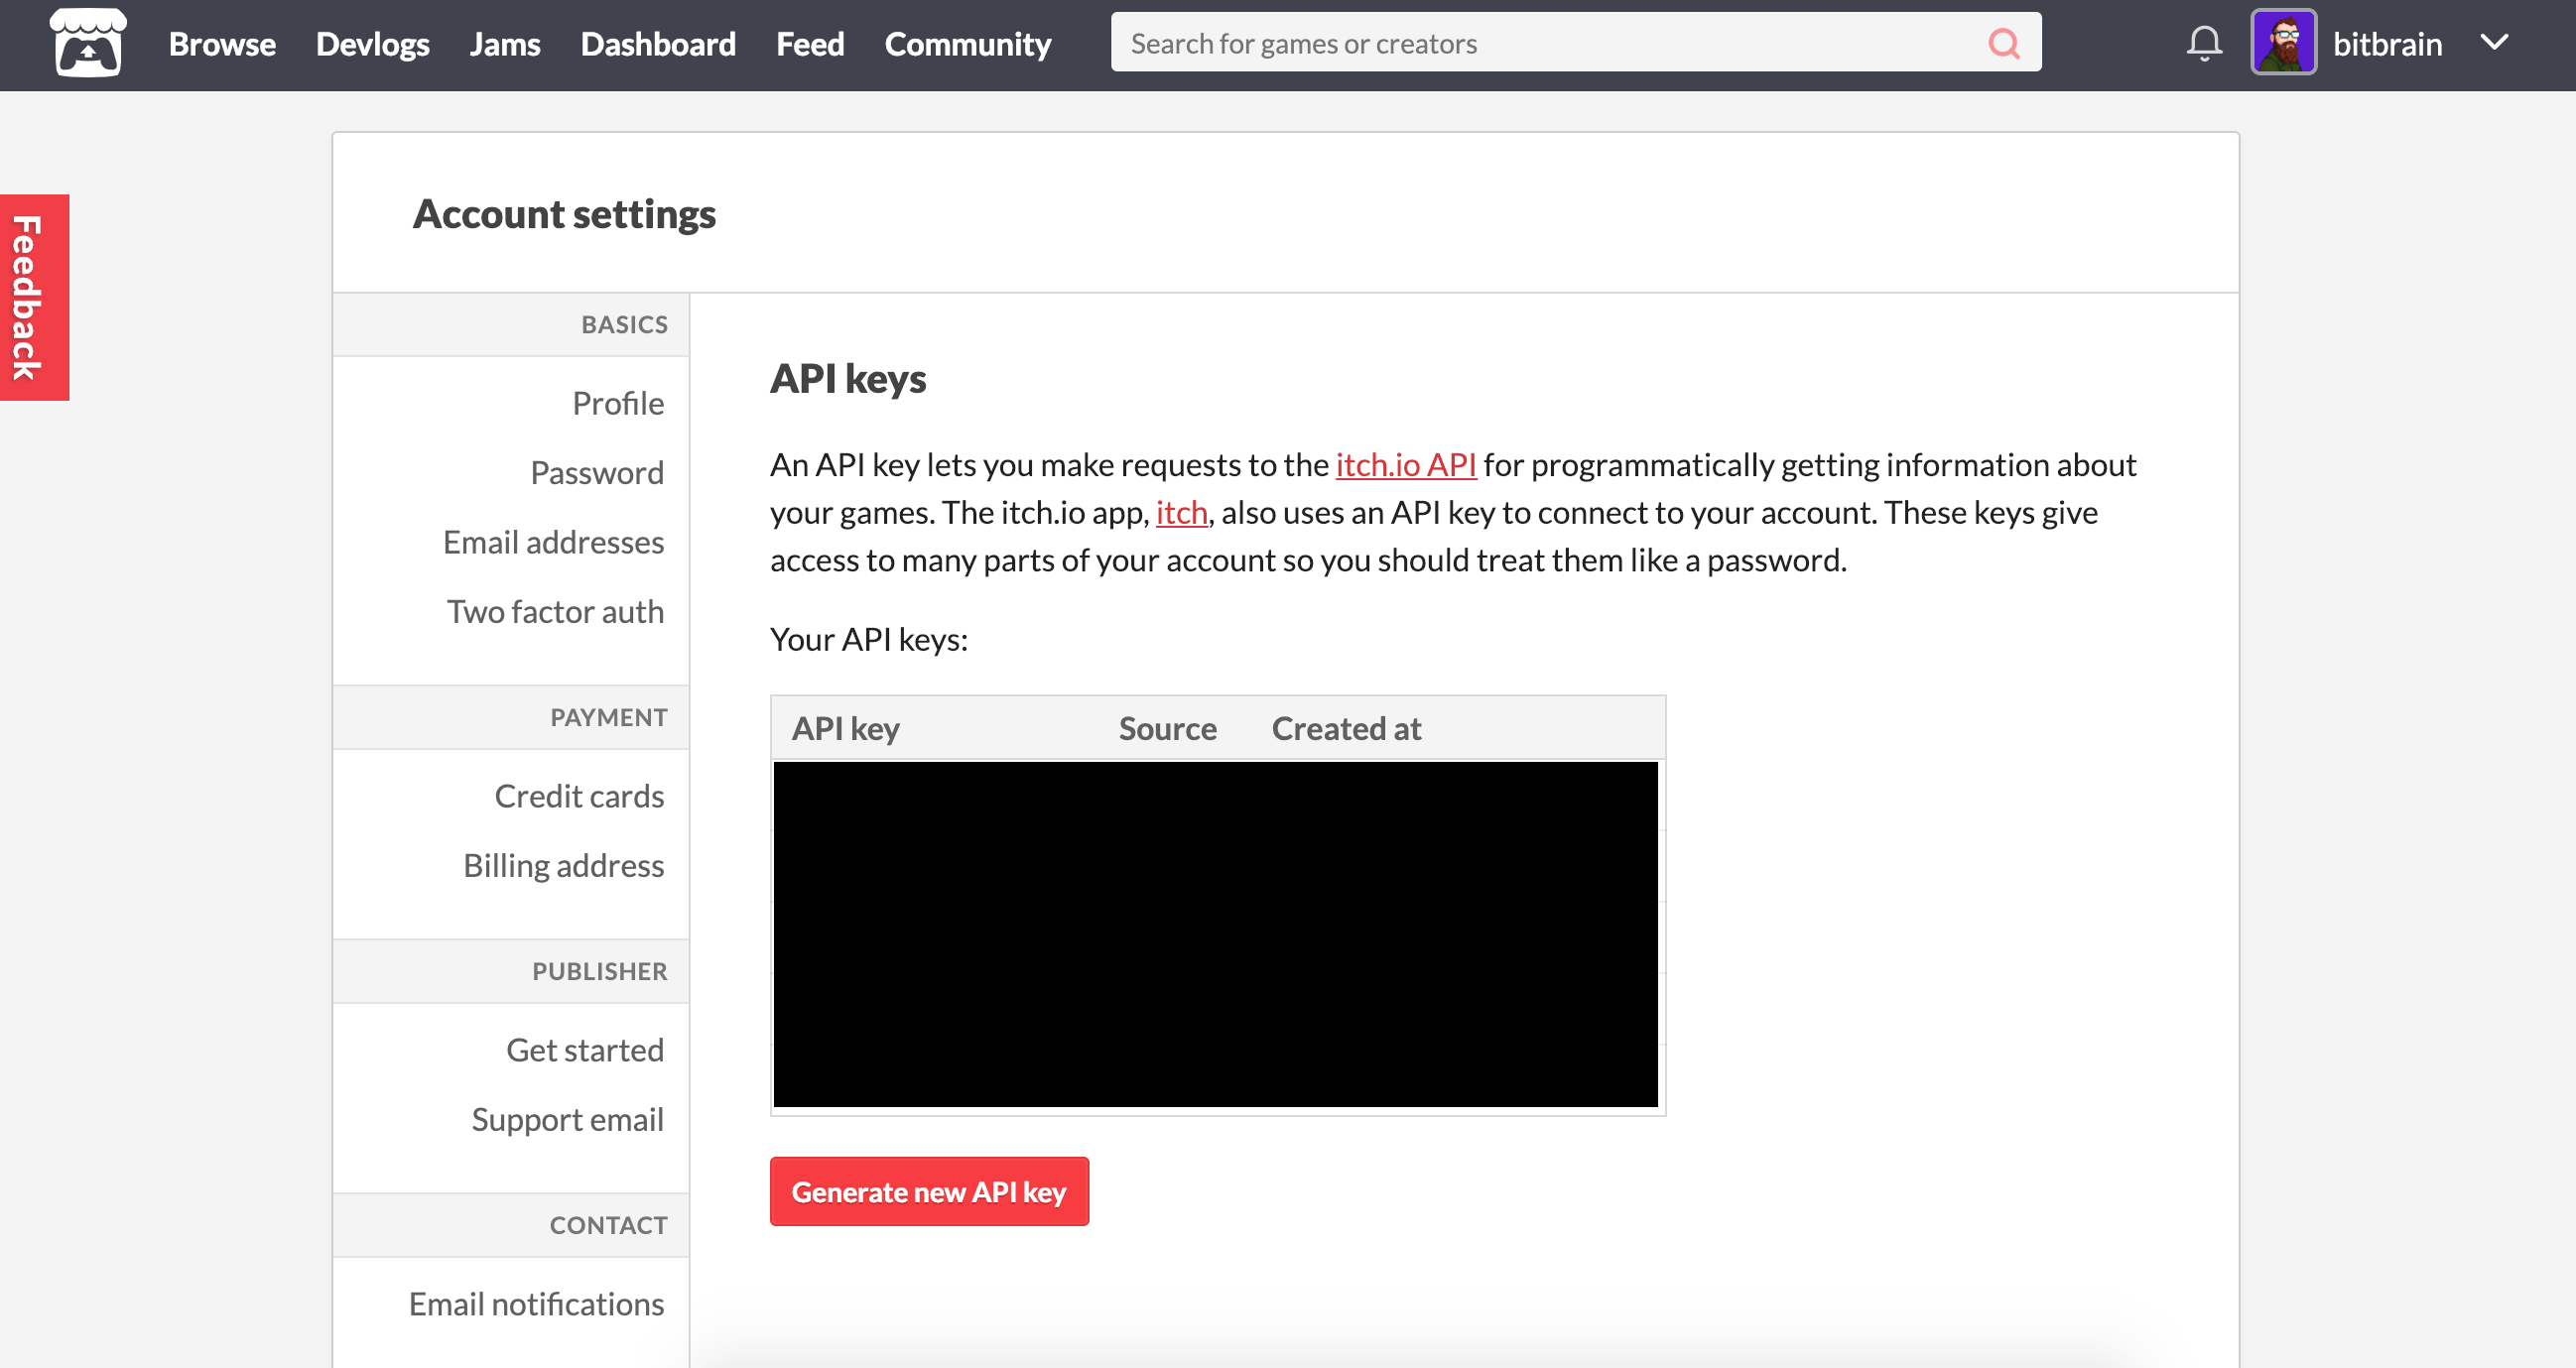
Setting up itch.io
In order to make this entire process work, we first have to setup a so called token in itch.io:
Setup secrets in Github
Next, we are going to set up the secrets within Github. Head over to Account Settings -> Developer settings -> Personal access tokens and generate a new token:
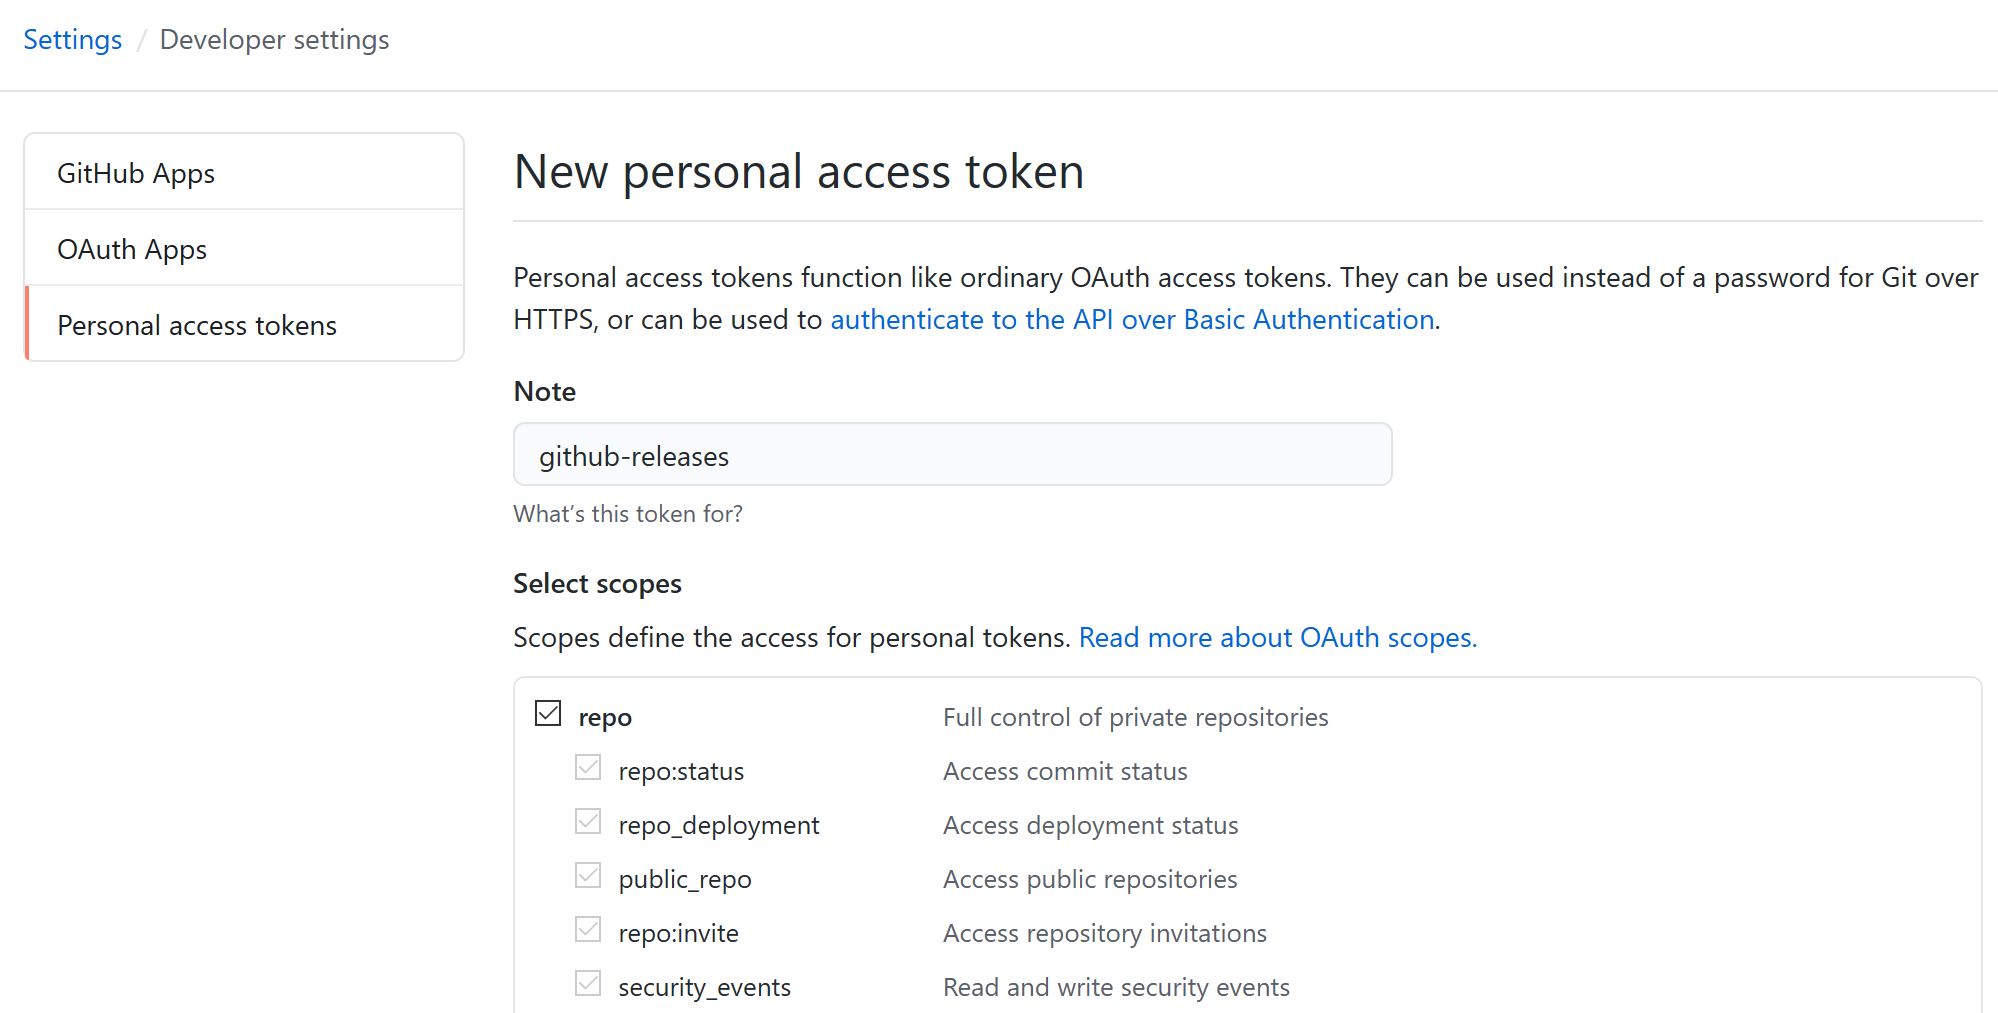
You will not be able to see this token again once generated! Save it somewhere locally in a file for later use.
ATTENTION! Never use keys/tokens within your code! Hackers can easily gain access to your account then. Instead, set up Github secrets that you can reference in your scripts.
Next, head to your Github repository configuration page and add secrets:
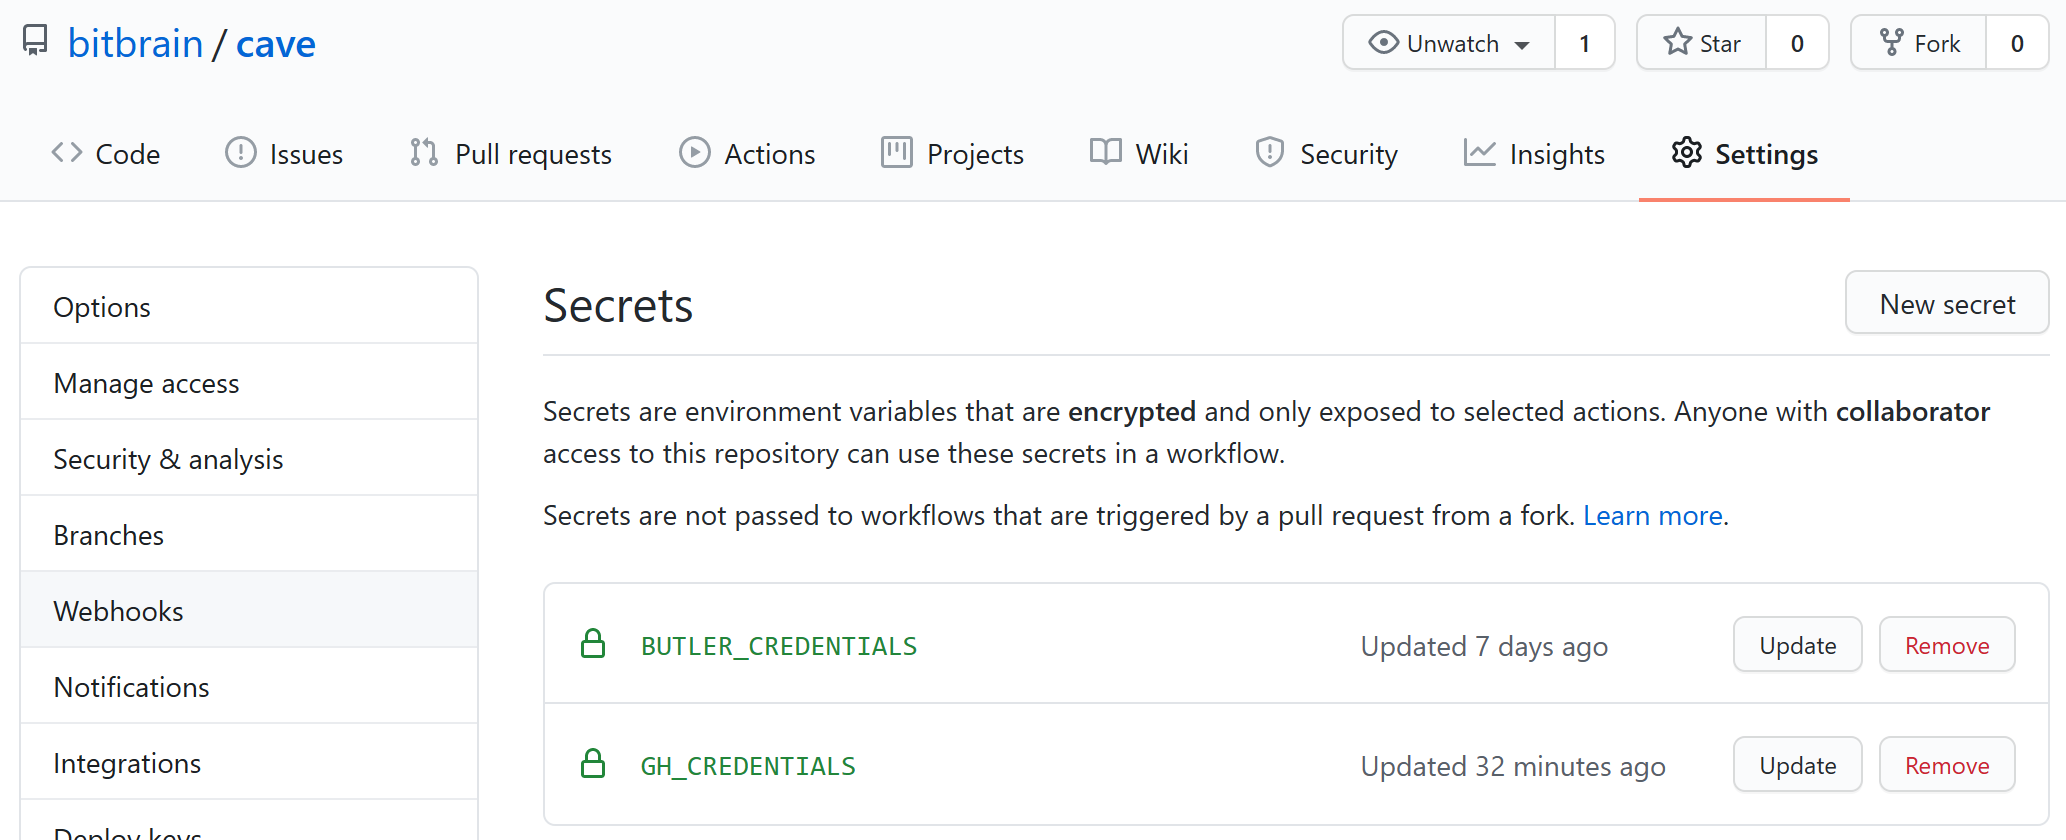
BUTLER_CREDENTIALSis the value of the itch.io key you previously generatedGH_CREDENTIALSis the value of your Github token you previously generated
It is very important to use a custom GH_CREDENTIALS within Github actions. Due to a limitation, Github does not trigger any action when the default GITHUB_TOKEN secret is being used to create releases:
Releases created when authenticating with the GITHUB_TOKEN will prevent new workflows from running. If you want to run new workflows, you’ll need to set up a different PAT and add that as a secret.
- ethomson (Github Staff)
Create a export_presets.cfg file
Within Godot, head over to Project -> Export... and create a new export entry:
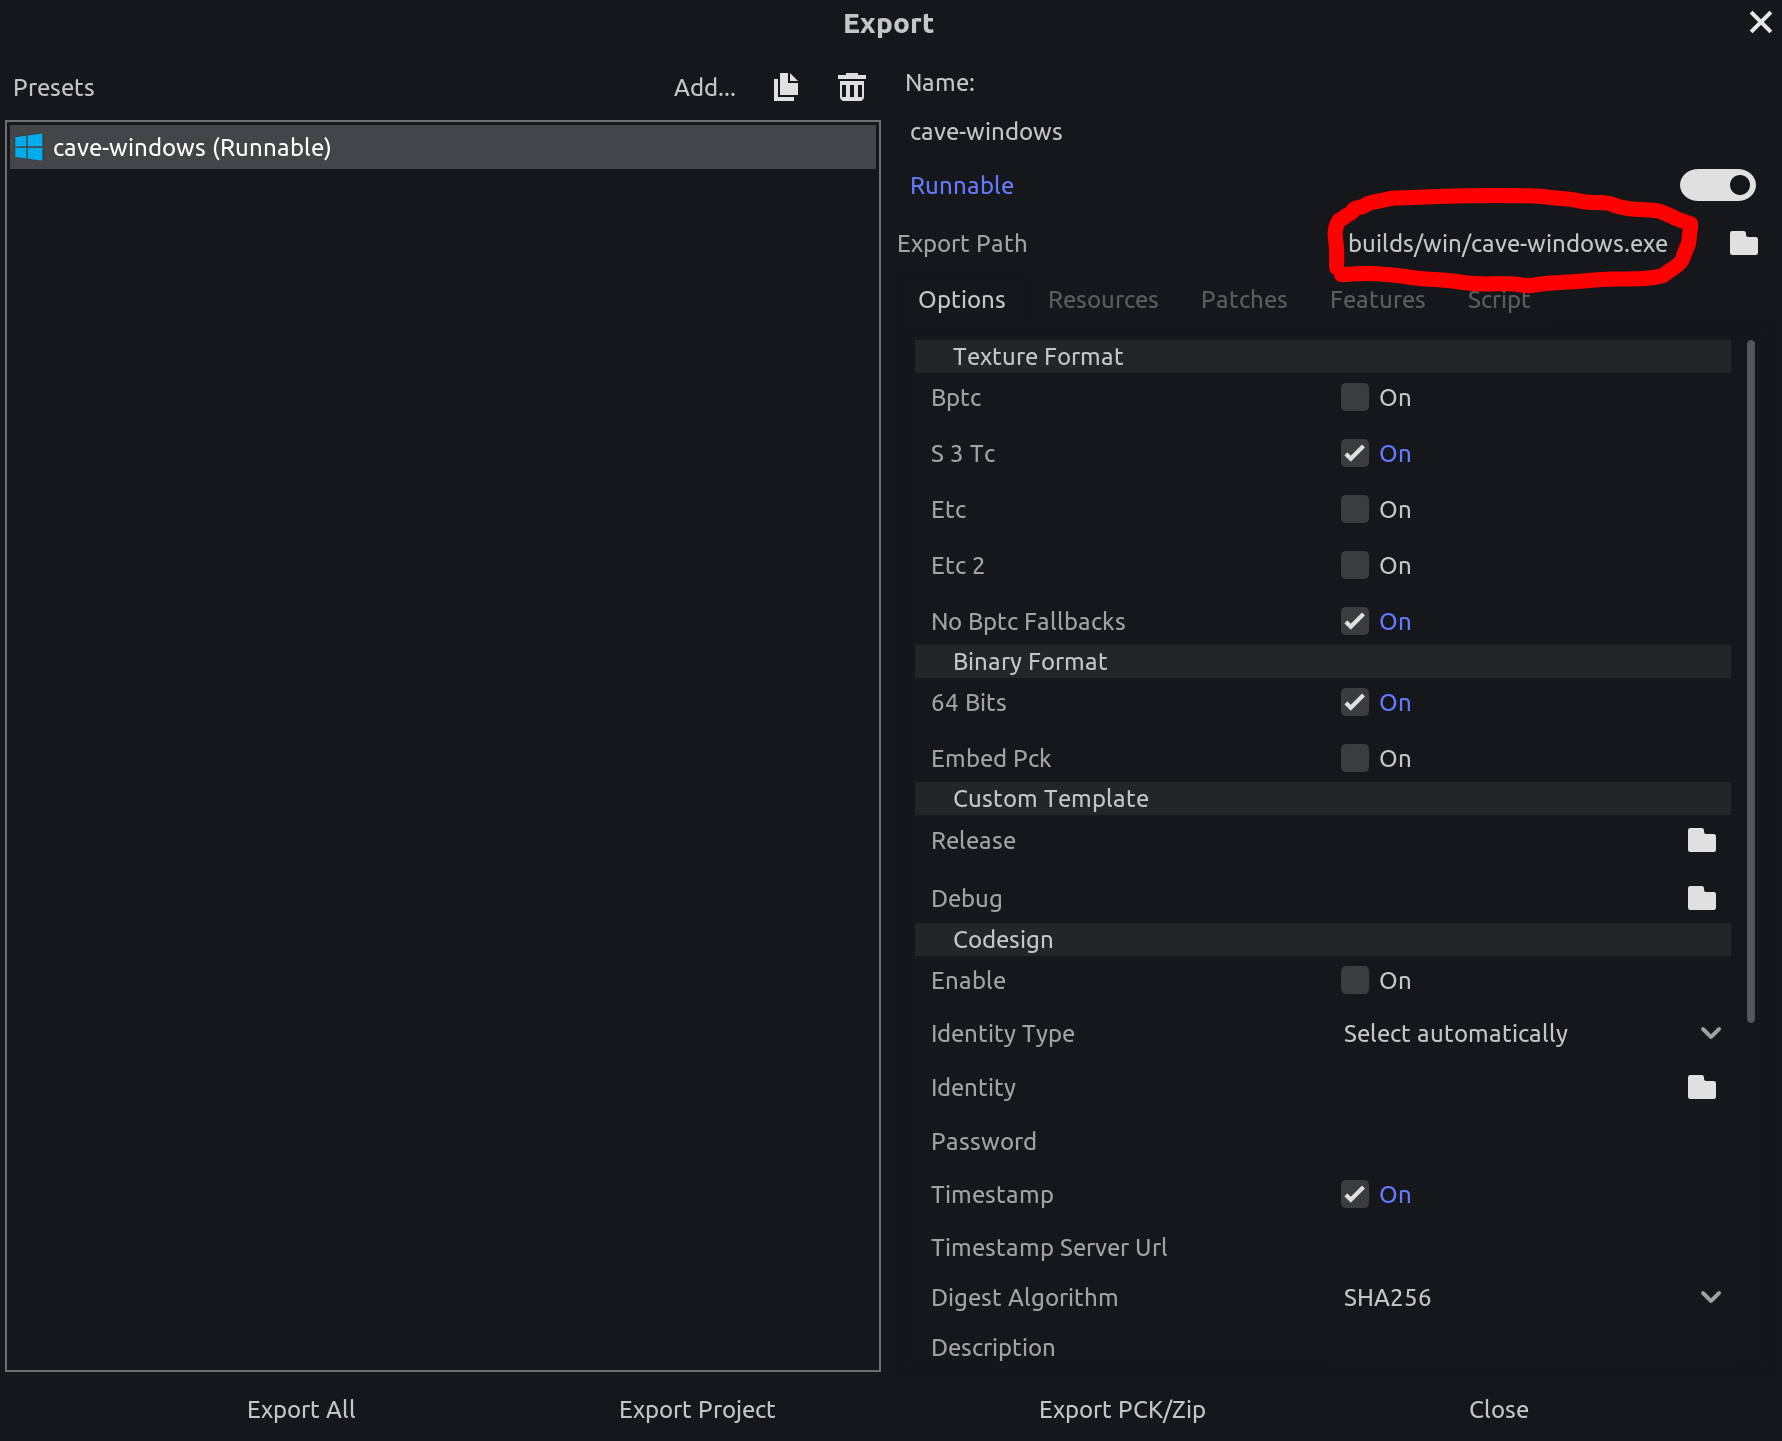
Also, make sure to define an export path and give it a name (e.g. yourgame-windows). This will be the name of the game file in itch.io. Saving your configuration automatically generates a export_presets.cfg file that you need to commit to your Github repository. Make sure that your .gitignore does not accidentally exclude this file!
Create Github actions
After you setup the secrets within your repository and pushed your export presets, it is now time to configure the Github actions.
Within the root of your repository, create a new .github/workflows directory that will contain all the actions (*.yml files).
Create release action
Create a new file under .github/workflows/create-release.yml:
on:
  push:
    branches:
      - master

jobs:
  export_game:
    # Always use ubuntu-latest for this action
    runs-on: ubuntu-latest
    # Job name, can be anything
    name: Export game to Github
    steps:
      # Always include the checkout step so that
      # your project is available for Godot to export
      - name: checkout
        uses: actions/checkout@v2.3.1
        # Ensure that you get the entire project history
        with:
          fetch-depth: 0
      - name: create game release
        # Use latest version (see releases for all versions)
        uses: firebelley/godot-export@v2.3.0
        with:
          # Defining all the required inputs
          # I used the mono version of Godot in this example
          godot_executable_download_url: https://downloads.tuxfamily.org/godotengine/3.2.2/mono/Godot_v3.2.2-stable_mono_linux_headless_64.zip
          godot_export_templates_download_url: https://downloads.tuxfamily.org/godotengine/3.2.2/mono/Godot_v3.2.2-stable_mono_export_templates.tpz
          # set this either to . or your game path, e.g. ./godot in case
          # your game is within a sub-directory
          relative_project_path: .
        env:
          GITHUB_TOKEN: ${{ secrets.GH_CREDENTIALS }}
          ACTIONS_ALLOW_UNSECURE_COMMANDS: 'true'
Let’s have a look into the steps. First, we define when the action should get triggered. If you do not want to create a new release
everytime you push, replace the branch with a different branch, e.g. release
on:
  push:
    branches:
      - master
Afterwards, we use the firebelley/godot-export action to build our game. This one requires the export_presets.cfg to be present in your relative_project_path specified in order to work. Also, it is important to set the environment variable so Github is able to push a new release for us:
GITHUB_TOKEN: ${{ secrets.GH_CREDENTIALS }}
The versioning will be done automatically for you, however you can also provide additional configuration to the action to control the versioning yourself.
Publish to itch.io action
The following example publishes to Windows only, however you can add additional platform releases as additional jobs. Create a new file under .github/workflows/publish-to-itchio.yml:
on:
  release:
    types: [published]

jobs:
  release_windows:
    runs-on: ubuntu-latest
    steps:
      - name: download Windows
        id: download-windows
        uses: dsaltares/fetch-gh-release-asset@master
        with:
          file: yourgame-windows.zip
        env:
          GITHUB_TOKEN: "${{ secrets.GH_CREDENTIALS }}"
      - name: deploy to itch.io (Windows)
        uses: josephbmanley/butler-publish-itchio-action@master
        env:
          BUTLER_CREDENTIALS: ${{ secrets.BUTLER_CREDENTIALS }}
          CHANNEL: windows
          ITCH_GAME: yourgame
          ITCH_USER: your itchio account
          PACKAGE: yourgame-windows.zip
          VERSION: ${{ steps.download-windows.outputs.version }}
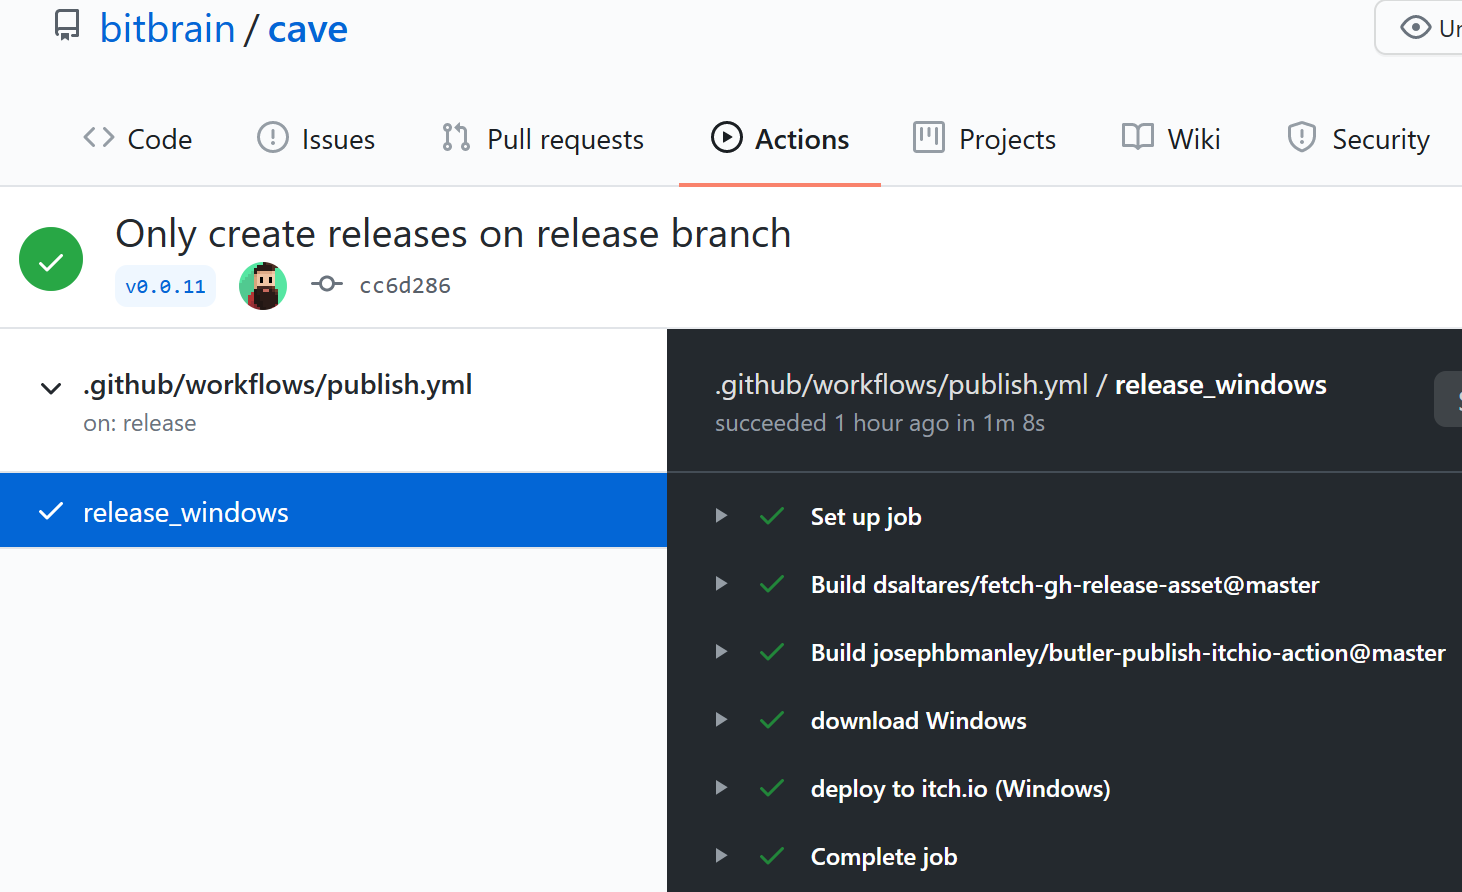
Voila! Now commit and push everything and it should automatically create a release for you:
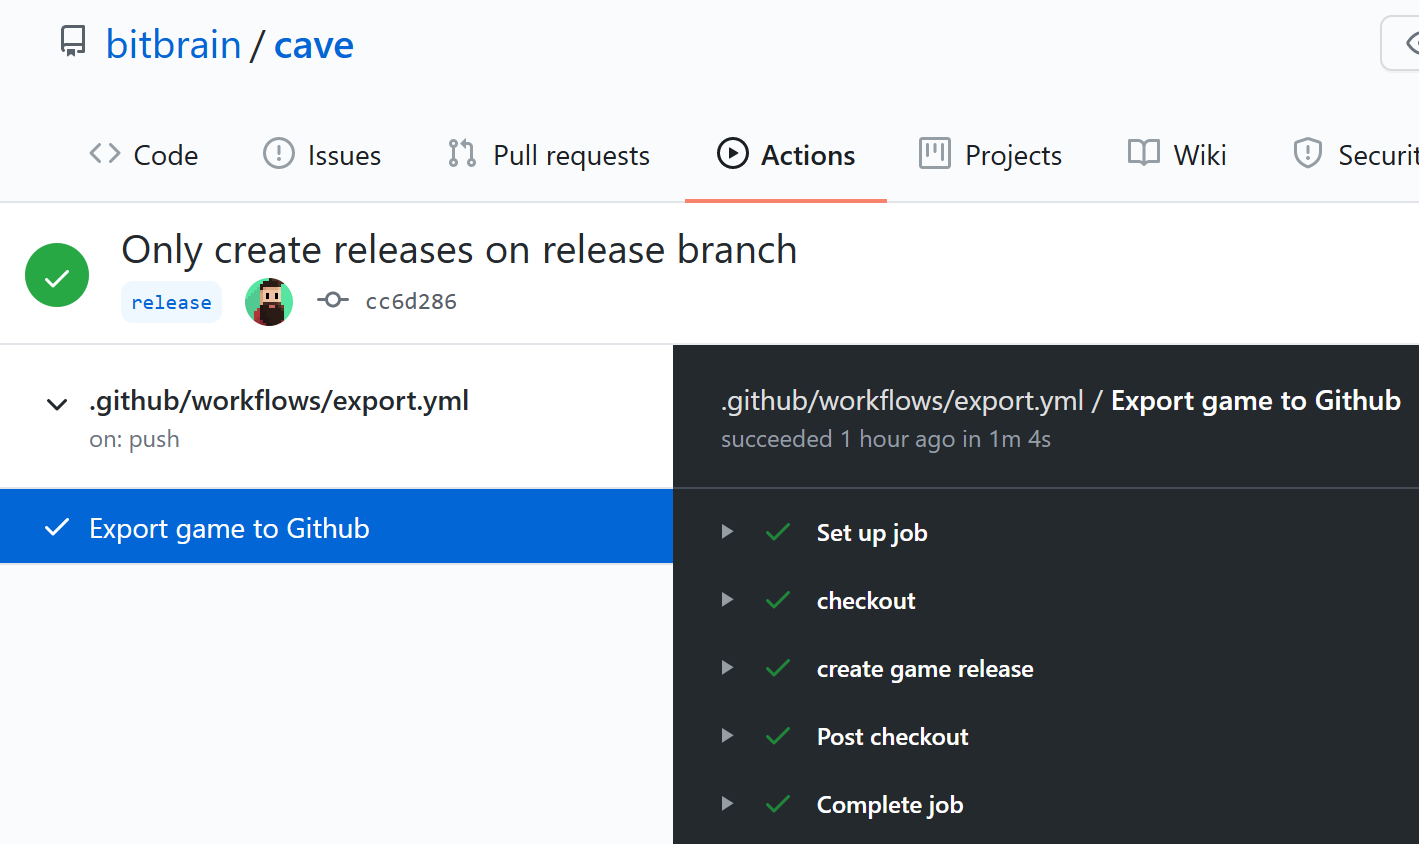
After the release is created, Github will automatically trigger the next action to publish your game to itch.io: