Workflow of releasing a gem-based Jekyll theme
This Jekyll-based blog has been built with a custom theme created called jekyll-dash. Initially, I built this theme just to share it with others, however, more and more people started using it over the past few months.
In this article I want to highlight some of the challenges I faced trying to maintain this theme for a lot of people and the workflow I introduced that helped me to overcome these challenges.
An “auto-update” theme
When I first started this theme I found it quite annoying that I constantly had to manually update my Jekyll files such as layouts, Sass and pages to apply a change to my blog. Especially, when trying to keep the theme in its own dedicated repository this can become a demanding chore.
The solution to this was to bundle my theme as a so called Ruby gem and then use that gem within the _config.yml of Jekyll:
theme: jekyll-dash
Jekyll will automatically apply the theme if it is specified as a gem within Gemfile:
gem 'jekyll-dash'
Whenever I push a new version of the gem to the public rubygems repository, rebuilding my site would use the new changes and automatically include them - neat!
Limitations of Github Pages
Unfortunately, I quickly had to realise that a lot of people were unable to use my theme natively within Github pages. Github are actually the creators behind Jekyll and when you create a repository containing Jekyll files, it will automatically build them for you and publish them when the Github pages feature is enabled.
There was just one problem: Github pages did not support Jekyll 4.x at the moment of this writing but only Jekyll 3.x. This becomes a problem because my theme was natively built with Jekyll 4.
Therefore, I had to introduce a multi-version workflow:
- version
1.xwill support Jekyll 3 - version
2.xwill support Jekyll 4
I created separate branches for those and specified the Jekyll version explicitly within the .gemspec file of jekyll-dash:
spec.add_runtime_dependency "jekyll", "~> 4.0"
This worked very well for my usecase and I was able to use the theme natively in Github pages.
For what reason would I want to use Jekyll outside of the native Github pages integration then? Well, due to security reasons, Github Pages does only allow a very specific set of Jekyll plugins to be enabled. This restricts customisation of the site. For example, I also needed the following features:
- gravatar support
- auto-generated tags and tag cloud
The solution was to build the site externally outside of Github Pages but then push the generated site onto a Github Pages enabled repository. I achieved that by using travis-ci.org which became eventually difficult to manage. As a result, I left Travis behind and moved over to Github Actions.
Improving the workflow
My initial release workflow looked as follows:
- push a new commit to the
mainbranch containing the updated version within the.gemspec - push a new tag for the given commit
- release the gem (see script below)
before_install:
- gem install bundler -v 2.0.1
script:
- bundle install
deploy:
  provider: rubygems
  api_key: $RUBYGEMS_API_KEY
  gem: jekyll-dash
  on:
    tags: true
    repo: bitbrain/jekyll-dash
There were a couple of issues with this approach:
- the pipeline ran outside of Github while Github support Github Actions out-of-the-box
- unable to see what each release entails, as Github releases and git tags were not created for a new release
- difficult to manage multiple major versions, as this pipeline would always deploy what the tag said. I had to be very careful to not cause unecessary merge conflicts
- individual commits were not really built and tested. Especially for people trying to make contributions it was difficult to tell if their change would break the Jekyll build
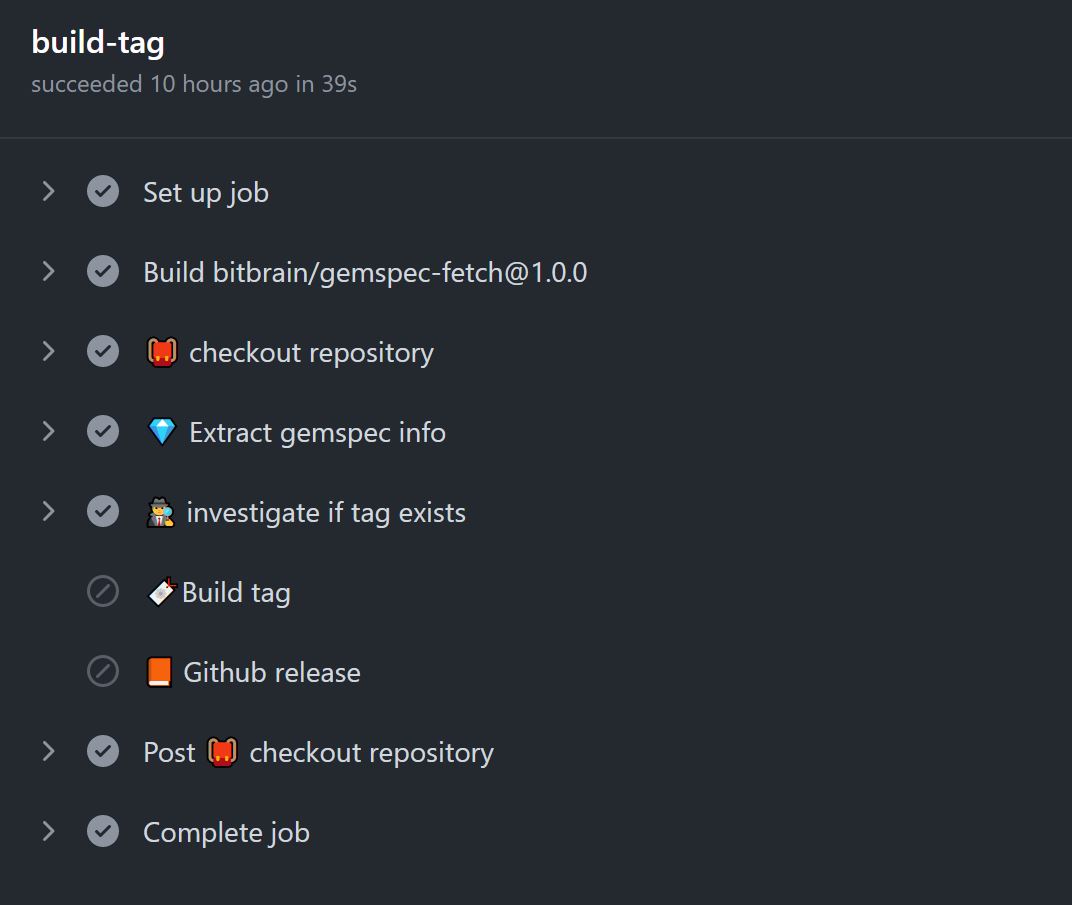
I discarded this workflow and introduced a completely new one built from scratch based on Github Actions:
- Build jekyll site for each individual commit and report on its status code
- When committing to the branches
main(v2.x) and1.x(v1.x) respectively, do the following:- extract the current gem version from the .gemspec file with a custom-built Github action
- check git history if a tag for the extracted gem version exists already
- in case the tag does not exist yet, create a new git tag and push a new Github release
- Whenever a new tag has been pushed, build and publish the gem for that tag to rubygems.org

In order to check that the gem version exists as a tag, I am using the github-tag-action:
- name: 💎 Extract gemspec info
id: gemspec_fetch
uses: bitbrain/gemspec-fetch@1.0.0
with:
specfile: jekyll-dash.gemspec
- name: 🕵️♂️ investigate if tag exists
uses: mukunku/tag-exists-action@v1.0.0
id: tag-check
with:
tag: 'v${{ steps.gemspec_fetch.outputs.version }}'
env:
GITHUB_TOKEN: ${{ secrets.GH_CREDENTIALS }}
This allows me then to apply an if conditional on any other steps:
- name: 🔖Build tag
  if: ${{ steps.tag-check.outputs.exists == 'false' }}
  id: tag_version
  uses: mathieudutour/github-tag-action@v5.6
  with:
    github_token: ${{ secrets.GH_CREDENTIALS }}
    default_bump: false
    custom_tag:  ${{ steps.gemspec_fetch.outputs.version }}
    tag_prefix: v
The slightly tricky part was to extract the version from the .gemspec file. For that I build my own Github Action that is using parse-gemspec-cli to extract the metadata accordingly:
#!/bin/bash

SPEC_DATA=$(parse-gemspec-cli $INPUT_SPECFILE)

echo "::set-output name=name::$(echo $SPEC_DATA | jq -r '.name')"
echo "::set-output name=description::$(echo $SPEC_DATA | jq -r '.description')"
echo "::set-output name=summary::$(echo $SPEC_DATA | jq -r '.summary')"
echo "::set-output name=version::$(echo $SPEC_DATA | jq -r '.version')"
echo "::set-output name=homepage::$(echo $SPEC_DATA | jq -r '.homepage')"
This new workflow allows me to build and test every single commit and it gives me full control of when I want to release a new gem: I simply bump the version of the gem manually within the .gemspec and Github will do the rest for me!
